Latest: Download Microsoft All Product Activator | Hot: Active IDM in 1 Click | Blogger Gadget
  • Posts
  • Comments
  • Pageviews

Another Stylish Bubble Threaded Comment

2 comments
Threaded comment is most stylish & popular system for blogger. For a stylish blog you have to need a stylish comment bar. Through which visitors can give their opinion & advice. Today you can to know about a stylish comment bar. Just follow this post to add this threaded comment.

Threaded Comment

We use css based code so its do not increase your page loading time. Get ready to add this threaded comment.......

  • First Log in your blog
  • Just click Template
  • Backup your Template
  • Then click  Edit Html
  • Search (ctrl+f) ]]></b:skin>
  • Just paste the bellowing code before/abode ]]></b:skin>

/* http://tech-everyday.blogspot.com */
.comments{clear:both;margin-top:10px;margin-bottom:0;font-family:Arial;line-height:18px;font-size:13px}
.comments .comments-content{margin-bottom:16px;font-weight:normal;text-align:left}
.comments .comment .comment-actions a,.comments .comment .continue a{display:inline-block;margin:0 0 10px 10px;padding:0 15px;color:#424242 !important;text-align:center;text-decoration:none;background:#fede72;border:1px solid #fec648;border-radius:2px;height:26px;line-height:28px;font-weight:normal;cursor:pointer}
.comments .comments-content .comment-thread ol{list-style-type:none;padding:0;text-align:none}
.comments .comments-content .inline-thread{padding:0}
.comments .comments-content .comment-thread{margin:8px 0}
.comments .comments-content .comment-thread:empty{display:none}
.comment-replies{margin-top:1em;margin-left:40px;background:#fff}
.comments .comments-content .comment{margin-bottom:0;padding-bottom:0}
.comments .comments-content .comment:first-child{padding-top:16px}
.comments .comments-content .comment:last-child{border-bottom:0;padding-bottom:0}
.comments .comments-content .comment-body{position:relative}
.comments .comments-content .user{font-style:normal;font-weight:normal}
.comments .comments-content .user a{color:#0E6284;font-weight:normal;text-decoration:none}
.comments .comments-content .icon.blog-author{width:18px;height:18px;display:inline-block;margin:0 0 -4px 6px}
.comments .comments-content .datetime a{color:#0E6284;font-size:12px;float:right;text-decoration:none}
.comment-content{margin:0 0 8px;padding:0 5px}
.comment-header{font-size:18px;background-color:#f1f1f1;border-bottom:1px solid #e3e3e3;padding:5px}
.comments .comments-content .owner-actions{position:absolute;right:0;top:0}
.comments .comments-replybox{border:none;height:230px;width:100%}
.comments .comment-replybox-thread{margin-top:0}
.comments .comment-replybox-single{margin-top:5px;margin-left:48px}
.comments .comments-content .loadmore a{display:block;padding:10px 16px;text-align:center}
.comments .thread-toggle{cursor:pointer;display:inline-block}
.comments .comments-content .loadmore{cursor:pointer;max-height:3em;margin-top:0}
.comments .comments-content .loadmore.loaded{max-height:0;opacity:0;overflow:hidden}
.comments .thread-chrome.thread-collapsed{display:none}
.comments .thread-toggle{display:inline-block}
.comments .thread-toggle .thread-arrow{display:inline-block;height:6px;width:7px;overflow:visible;margin:0.3em;padding-right:4px}
.comments .thread-expanded .thread-arrow{background:url("data:image/png;base64,iVBORw0KGgoAAAANSUhEUgAAAAc AAAAHCAYAAADEUlfTAAAAG0lEQVR42mNgwAfKy8v/48I4FeA0AacVDFQBAP9wJkE/KhUMAAAAAElFTkSuQmCC") no-repeat scroll 0 0 transparent}
.comments .thread-collapsed .thread-arrow{background:url("data:image/png;base64,iVBORw0KGgoAAAANSUhEUgAAA AcAAAAHCAYAAADEUlfTAAAAJUlEQVR42mNgAILy8vL/DLgASBKnApgkVgXIkhgKiNKJ005s4gDLbCZBiSxfygAAAAB JRU5ErkJggg==") no-repeat scroll 0 0 transparent}
.avatar-image-container{background:url(https://blogger.googleusercontent.com/img/b/R29vZ2xl/AVvXsEhanaJU0mWTLpcYaItzjiX3m0Zwzm_tmOyA59aeWl9KJ7DeAVZqgr77y6Wvjk4F_kUrj7NKB4RE7FMb5YoCLvsosq0J9i3MXyaoatRAFJWLY5YXcYKR74TIi57O8oXI_KO3WJ_atm0N2H8/s51/arrow.png) top right no-repeat;float:left;vertical-align:middle;overflow:hidden;width:65px !important;height:51px !important;max-width:65px !important;max-height:51px !important}
.comments .avatar-image-container img{padding:2px;border:1px solid #ccc;width:45px !important;height:45px !important;max-width:45px !important;max-height:45px !important}
.comments .comment-block{margin-left:65px;position:relative;border:5px solid #e3e3e3;border-radius:8px}
@media screen and (max-device-width:480px){.comments .comments-content .comment-replies{margin-left:0}}
/* http://tech-everyday.blogspot.com */ 

  • Save your template

How to Create a Wi-Fi Hotspot without Router???

0 comments
If you have a laptor or desktop pc so you can make a wi-fi hotspot. Now a days every laptop has built in WiFi. To make a WiFi hotspot you do not need any router. You can use it fully speed. Just you need a software to make a WiFi hotspot. You can share your internet with other device through this software. So get ready to make your personal WiFi hotspot zone.

Features:

  • Totally freeware
  • No need any license or serial key
  • Easy to use
  • If you want so it will be connected automatically when your pc start
  • Manage your clients

Hotspot,Wi-fi

You can download this freeware awesome software from bellowing link

How to add colorful Total Pageviews widget?

33 comments
Widget can helps you to make a wonderful blog. Total Pageview widget is a important widget for your blog. Everyone can to know about your blogs statistics. How number of  visitors visit your blog. Total post & total comments are also shown through this widget. This widget is more colorful & attractive.  We use some css code so don't be afraid because css code never use your memory. To add this widget just follow this post steps by steps.
Pageviews widget

How to add ?


  • Log in your blog
  • Go to Templates
  • Then click Edit Html
  • Search (ctrl+f) ]]></b:skin>
  • Add bellowing css code just before/above ]]></b:skin>

#Stats1 ul{margin:0px 0;border:0;padding:0}
#Stats1 li{
display:inline;
width:30%;
border:0;
color:#fff;
float:left;
text-decoration:none;
margin:0;font-size:12px;
list-style-type:none
}
#Stats1 li:hover{
opacity: 0.7;
filter:alpha(opacity=70); /* For IE8 and earlier */
}
#Stats1 h4{margin:0;font-size:18px;line-height:1.2em;color:#fff;padding: 0 5px 0 5px;}
#Stats1 span{font-size:12px;color:#fff;padding: 0 5px 0 5px;}
#totalposts{
background: #0090D5;
}
#totalComments{
background: #FFB200;
}
#totalCount{
background: #FF3300;
} 

  • Then you have to search
<b:widget id='Stats1' locked='false' title='Total Pageviews' type='Stats'>...</b:widget>
  • Replace the following code

Pageviews widget


<b:widget id='Stats1' locked='false' title='' type='Stats'>
  <b:includable id='main'>
<b:if cond='data:title'><h2><data:title/></h2></b:if>
    <div class='widget-content'>
      <ul>
        <li id='totalposts'>
          <h4 id='Stats1_totalPosts'>&amp;hellip;</h4>
          <span>Posts</span>
        </li>
        <li id='totalComments'>
          <h4 id='Stats1_totalComments'>&amp;hellip;</h4>
          <span>Comments</span>
        </li>
        <li id='totalCount'>
          <h4 expr:id='data:widget.instanceId + &quot;_totalCount&quot;'>&amp;hellip;</h4>
          <span>Pageviews</span>
        </li>
      </ul>
      <script type='text/javascript'>
//<![CDATA[
function totalPosts(json){document.getElementById('Stats1_totalPosts').innerHTML=json.feed.openSearch$totalResults.$t};function totalComments(json){document.getElementById('Stats1_totalComments').innerHTML=json.feed.openSearch$totalResults.$t};document.write('<script type=\"text/javascript\" src=\"/feeds/posts/default?alt=json-in-script&max-results=0&callback=totalPosts\"><\/script><script type=\"text/javascript\" src=\"/feeds/comments/default?alt=json-in-script&max-results=0&callback=totalComments\"><\/script>');
//]]>
      </script>
    </div>
  </b:includable>
</b:widget>

Note:You should back up your template first.

How to add Rounded Corners Popular Post Widget

275 comments
Popular Post Widget

Popular post widget is an essential widget for a blog. Every visitors can to see which post are most view. This widget is very cool & stylish than other popular post widget. Post thumbnail shown as a circle. Every bloggers use popular post widget for visitors attraction because through it visitors can to know which post are most read. If you want to use this widget just follow this post.

  • Log in your blog --> then click Templates --> Edit Html
  • Then Search (ctrl+f) ]]></b:skin>
  • Paste the bellowing code before/above ]]></b:skin>

/* http://tech-everyday.blogspot.com */
.popular-posts ul{padding-left:0px;}
.popular-posts ul li {background: #FFF url() no-repeat scroll 5px 10px;
list-style-type: none;padding:5px 5px 5px 20px !important;
border: 1px solid #ddd;border-radius:30px;
-moz-border-radius:30px;
-webkit-border-radius:30px;
-moz-border-radius: 30px;
-webkit-border-radius: 30px;
height: 40px;
-moz-box-shadow: 3px 2px 5px #242424;
-webkit-box-shadow: 3px 2px 5px #242424;
box-shadow: 3px 2px 5px #242424;margin-bottom: 5px;height: 40px;
}
.popular-posts ul li a {
font-style: italic;
}
.popular-posts ul li:hover {
border:1px solid #d10202;
 -moz-box-shadow: 3px 2px 5px #d10202;
-webkit-box-shadow: 3px 2px 5px #d10202;
box-shadow: 3px 2px 5px #d10202;
}
.popular-posts ul
li a:hover {
text-decoration:none;
}
.popular-posts .item-thumbnail img {
height:40px;width:40px;
webkit-border-radius: 100px;-moz-border-radius: 100px;border-radius: 100px;
-webkit-box-shadow: 0 1px 3px rgba(0, 0, 0, .4);-moz-box-shadow: 0 1px 3px rgba(0, 0, 0, .4);box-shadow: 0 1px 3px rgba(0, 0, 0, .4);
}
.popular-posts .item-thumbnail img:hover{
-moz-box-shadow: 0px 0px 5px #d10202;
-webkit-box-shadow: 0px 0px 5px #d10202;
box-shadow: 0px 0px 5px #d10202;}

  • Then go to Layout --> Add A Gadget and select Popular Posts

Popular Post Widget
 For without description so please unchecked snippet option. You can change post displaying number. Noe save & refresh your blog.


Stylish Mailing Software Ever !!!!!

3 comments
Mailing system is most popular means of communication. Now a days an educated person have an email address. For a successful career you have to need an email address for communication. Now i am telling about a digital mailing software.

mail,mail client, Incredimail, Stylish Mailing Software

Do you hear about Incredimail? Incredimail is a stylish & coolest email client. Incredimail is a different mailing client software. You can send email from your desktop. You can receive & read email from your desktop.

mail,mail client, Incredimail, Stylish Mailing Software

Feature:

  • Stylish & coolest notifier
  • Stylish Theme
  • Different kinds of emotions
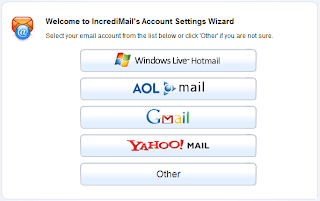
  • Can to add multi email account such as Windows Live-Hotmail,Aol Mail,Gmail,Yahoo Mail
  • Send, receive & read email from desktop
  •  Spam blocker
  • Automatic get your email
  • You can block email
  • Automatic reply option
  • Add more themes, emotions from incredimail gallery

mail,mail client, Incredimail, Stylish Mailing Software

Just try use it & i am sure you love it. After use just give your opinion about Incredimail.

mail,mail client, Incredimail, Stylish Mailing Software


Coolest Comment System For Your Blog!!!

1 comments
Everybody want to make a beautiful & stylish website or blog. If you want to make a stylish blog or website you should have to use different kinds of widget or plugin. Some widget or plugin makes your blog/website look like a professional blog. Always you should to remember your bloggers readers attraction & intention. For visitor attraction & opinion you have to place a stylish comment system which every visitors give their opinion & they can discuss about your blogs. Now i am sharing with yours about a Stylish,Coolest,Rocking & awesome comment system, which you can make a beautiful & attractive blog. I am sure you do not dislike it & over sure that you want to place this comment system on your blog. So get ready to know & adding a stylish comment system.

Disqus,Coolest Comment System 
Disqus is a most popular website which cang give you a stylish comment system for your online platform. You should to try this system. just for one time.

Advantage: 

  • Beautiful looking
  • You can add this comment system to your Wordpress,Blogger,Tumblr,Squarespace,Typepad,Movabletype,Drupal,Joomla
  • You can increase Your web-traffic
  •  Get Follower
  • You can import Blogger Comment

How do you install Disqus?

To install Disqus comment system in your online platform you have to need an e-mail address. Just go to this website & create an account.

  • Log in to Disqus. After log in go to Dashboard &click to Add.

Disqus,Coolest Comment System

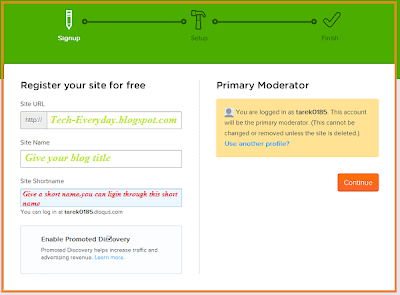
  • Then just give your website or blog URL & Title. Give a short name through this short name you can log in to Disqus.

Disqus,Coolest Comment System

  • Then click Continue & chose your Online platform. Like as Wordpress,Blogger,Tumblr,Squarespace,Typepad,Movabletype,Drupal,Joomla.

Disqus,Coolest Comment System 

  • After choosing just add this comment system on your Platform

Disqus,Coolest Comment System

 How do you import Previous/Old comments?

Disqus,Coolest Comment System 

  • Just go to Dashboard & click your website. Click Discussion --> Import--> Click your platform

Disqus,Coolest Comment System

  • Just follow step by step

Disqus,Coolest Comment System

Note: Imports may take up to 24 hours to complete.

How to download Torrent Files using IDM?

0 comments
Hi Friends, Do you know about IDM ? I am sure that you know about IDM, if you love to download Music, Games,Software,Movie etc. IDM is a download booster that's can  speed up your download speed up to 500%. Now a days somebody love to download torrent files because torrent files. To download Torrent Files they use utorrent or other torrent downloader. Torrent downloader is too slower than idm so everybody wants to use IDM  for downloading torrent files. I hope you glad to know this post may helps you to download torrent files using IDM.

ZBIGZ


Zbigz is a most popular website to download torrent by IDM. Just you have to enter your torrent link otherwise you have to upload your torrent file. After enter your torrent link or upload tour torrent file just click GO & enjoy downloading using IDM.

How to download Torrent Files using IDM?
You do not need any registration to download Torrent

BOXOPUS

Another Torrent file downloading site. You also download torrent files using IDM but disadvantage of this site is you have to register. If you do not interested to sign up so you can use facebook or twitter id.

How to download Torrent Files using IDM?

TORRENTHANDLER

How to download Torrent Files using IDM?

Another fastest torrent downloading website just try & enjoy your downloading.

How to download Torrent Files using IDM?

How to place / show your Google Adsense ads below every post title in blogger?

0 comments
Google Adsense is a special service of Google. It is a most popular advertising network. Google takes order for publicity of millions of different companies & through Adsense, Google gives these companies ads in your blogs. Those companies pay to Google for publicity of their products & Google pay you to place their ads in your blog. If you have an Adsense account so you can earn money through online.

How to place ads below every post title?


If you have a Adsense account so you have to know where you place Google Adsense ads. Bellowing post title is a right place for showing your Adsense ads. But it it most difficult to place ads post by post. Don't worry, i have an idea for placing your Adsense ads automatically in every post title. Just follow this post & giving thanks for this post if you are grateful.

 Google Adsense,Adsense

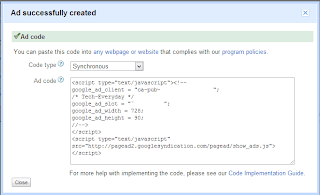
First convert your Adsense ads which you want to place bellow every post title
  • Then Just Log in your Blogger account
  • Then go to Template & Backup your template
  • After Edit Html & search the following code 
<data:post.body/>

  • Paste the bellowing code just above/before <data:post.body/>
<b:if cond='data:blog.pageType == &quot;item&quot;'>
    Your converted Ad Unit Code Goes Here
    </b:if>
Just see our picture

Google Adsense,Adsense

How to increase web traffic for a website?

26 comments
Everybody want to increase their web traffic to become a successful blogger. Someone knows how to increase web traffic but most of them who are a new blogger the do not know how to increase the website traffic & get more visitor for others country. If you want to increase your Blog Traffic,Twitter Followers, Facebook Likes, Facebook Shares, Tumblr,Stumbleupon through just a few moment. I hope you will be grateful to follow with us. Get ready to get more visitors & followers.
increase web traffic
Just go to this website & Sign up a account with an e-mail id. After sign up you get an e-mail from linkcollider so check your inbox otherwise check your spam box. Just active your account by clicking link. Then just log in to linkcollider & Click Post a website
increase web traffic
Just click Blog/Business/Personal/Facebook page for increasing your website traffic, facebook link & share. You can also add Twitter page to get Twitter's Followers, Pinterest &Youtube Page get more subscriber.
increase web traffic
To get more web traffic, Followers & Subscriber you have to pay token because you have to pay tokens  who click your website/become your twitter follower or become a subscriber. You should to earn token for paying token to yours visitors or followers. You can collect token from Tweeting, Facebook Sharing, Liking a website, Following Twitter page, Following Pinterest, Subscribing Youtube, Posting on Tumblr, Posting on Stumbleupon, Clicking a website or Autosurf.
increase web traffic

 Advantage:

  • Get more visitors & web traffic
  • Get more Facebook Like
  • Twitter Followers
  • Youtube Subscribers
  • Pinterest Subscriber
  • Facebook Sharing

Disadvantage:

  • You can only post 3 website or blog
You can also earn token by sending your referral link. Just try one time & get more visitors & followers. If you will be grateful so feedback about thies post.  Sign up From Here

Alternative Download Manager Like IDM (Internet Download Manager)

1 comments
Download manager is very essential for increasing download speed. Internet download manager is most popular download manager all over the world but it is shareware. If you want to use it so you have to purchase it otherwise you have to used pirated copy. I want to say you that if you get all advantage of IDM so why you use IDM pirated copy? Xtreme Download Manager supports HTTP, HTTPS and FTP protocols, firewalls, proxy servers, file redirects, cookies, authorization etc. Just download & try for first time.

Xtreme Download Manager


Download Manager

Advantage:

  • Totally Freeware
  • Resume broken/dead downloads
  • Download any flv video from any site
  • Schedule download
  • Download speed up-to 500%
  • Integrates automatically with all browsers

 Disadvantage:

  • Need Java runtime
  • Speed limit option
Give your opinion about  Xtreme Download Manager

Online Speed Test Of Your Website

0 comments
Webpage loading time is most important part for your success. You have to know your your spirit & interest to become a successful blogger. To increase your blogs speed you should to optimize your blog's image & compress your blog's image before upload your blog. Maximum website speed test website suggest you to improve a site’s performance.
 Pingdom
Website Speed Test

Features:

  • Fully Free. No need any charge.
  • No need any registration or sign in
  • Easy to use.
  • Know your grade through 100
  • You can to know Page loading time & Page Size

Just Go to Pingdom for speed testing of your website


 Neustar

Website Speed Test


Features:

  • Simple  & easy to use
  • No need any charge or sign up
  • Suggest you to improve your site's performance
 Go to another website speed testing website Neustar


How to compress your image?

You can compress your blog's image through online. Some website can helps you to compress your images as a results your website loading time will be decrease. Everybody should use PNG format image for your lovely blog for decreasing your loading time.

online image compressing website:


Open Heart Sliding Social Bookmarking Widget For Blogger

0 comments
Open Heart Sliding Social Bookmarking Widget widget is gifted by sharethis team for Valentines Day. Looking cool & stylish widget that displaying several bookmarking button like Facebook,Twitter,Pinterest, LinkedIn, Stumble Upon, Email & much more. Open Heart Sliding Social Bookmarking Widget comes with a fixed position & stay in the corner on every page. Just try for one times & give your opinion about Open Heart Sliding Social Bookmarking Widget.

Social Bookmarking Widget

  • Log In your blogger account
  • Then go to Template
  • Click Edit Html
  • Search (ctrl+F) </head>
  • Paste the bellowing code just above/before  </head>

<!-- Start Open Heart Bookmarking Gadget From http://tech-everyday.blogspot.com/ -->
<script src='http://w.sharethis.com/gallery/shareegg/shareegg.js' type='text/javascript'/>
<script src='http://w.sharethis.com/button/buttons.js' type='text/javascript'/>
<script type='text/javascript'>stLight.options({publisher: &quot;ur-98d377f-bdd3-9ad1-fbe5-2a678f0a60ee&quot;, onhover:false}); </script>
<link href='http://w.sharethis.com/gallery/shareegg/shareegg.css' media='screen' rel='stylesheet' type='text/css'/>
<!-- End Open Heart Bookmarking Gadget From http://tech-everyday.blogspot.com/ -->

  • Then Search (ctrl+F) </body>
  • Paste the bellowing code just above/before </body>

<!-- Start Open Heart Bookmarking Gadget From http://tech-everyday.blogspot.com/ -->
<div style='position: fixed; bottom: 2%; left: 2%;'>
<div class='shareEgg' id='shareThisShareHeart'/>
</div>
<script type='text/javascript'>stlib.shareEgg.createEgg(&#39;shareThisShareHeart&#39;, [&#39;facebook&#39;,&#39;twitter&#39;,&#39;pinterest&#39;,&#39;linkedin&#39;,&#39;stumbleupon&#39;,&#39;email&#39;,&#39;sharethis&#39;], {title:&#39; <data:blog.pageTitle/>&#39;,url:&#39;<data:blog.url/>&#39;,theme:&#39;shareheart&#39;});</script><a href="http://tech-everyday.blogspot.com">Blogger Gadgets</a>
<!-- End Open Heart Bookmarking Gadget From http://tech-everyday.blogspot.com/ -->

Get ready for stylish open heart sliding social bookmarking widget. Keep visiting our blog..........

How to change blogger default avatar?

1 comments
In this post i want to share with yours about "How to change blogger default avatar"?  You can change your anonymous blogger comments avatar & blogger user who do not add any avatar. So get ready to change your default blogger avatar. Follow this post & encourage us by your feedback to know more.


  • Just go to your Dashboard
  • Then Template --> Edit Html
  • Search (ctrl+F) </body>
  • paste the bellowing code just above/before </body>

<script src='http://code.jquery.com/jquery-latest.js'/>
<script>
$(&quot;img[src=&#39;http://img1.blogblog.com/img/anon36.png&#39;]&quot;)
.attr(&#39;src&#39;, &#39;https://blogger.googleusercontent.com/img/b/R29vZ2xl/AVvXsEhg4FU592yj2T-RLaGM1jeCzUrW8itMeqVLCQqZVP-baArUbBPRi8VGFL0G-Fy6VKCwoJvzDDD7JYovXzkeq6p9UhYW-hYhvtsH4Q0kkz3o-79VoZzxP6QU60GSyuSrqjD_ozODEhUC6zg/s128/Tech-Everyday+(2).png&#39;)
.ssyby(&#39;blank&#39;)
</script>
<script src='http://code.jquery.com/jquery-latest.js'/>
<script>
$(&quot;img[src=&#39;http://img2.blogblog.com/img/b36-rounded.png&#39;]&quot;)
.attr(&#39;src&#39;, &#39;https://blogger.googleusercontent.com/img/b/R29vZ2xl/AVvXsEiLylen_GhmutY6PPu4gkq3Gk0VtSN_RiJiwUnXewJf2oNc8meu5k1x6C-CBHlrCwJWh1oVivkt2lE0gPY78BZRiD1alZ1aYmXTXmbMlzRr5I1WY4yJt-zWfRlZdx0BCm9aLZLpyj14aOU/s128/Tech-Everyday.png&#39;)
.ssyby(&#39;blank&#39;)
</script>


You can change this avatars


https://blogger.googleusercontent.com/img/b/R29vZ2xl/AVvXsEiv24_j_51X_R1GCfguO63-Hvffe9StTbMYPXjn4vs0e2VLcQ1I5qkfNbrdmINjZXCn-9mpuqsL7uAtmeMbLWdGk8akEVhEJFiXfA9cf4CN_zJJ0C4egJZHF43mJILWgaTnLnN52GQ4veA/s200/default_avatar.gif


https://blogger.googleusercontent.com/img/b/R29vZ2xl/AVvXsEhgOahEXvbE5zpyqJAzLbx7uF-7BMgmyyHqYQkPGalwfCa4U3ZhLW7MhtvHdBBpAkWpvtE9N4WzOlx8GmF9LV5RHZXdplBEkCASS57UNxbxm2GXT0j4d_BAMUkRb6kFQ3FbkBzEYLyjtN8/s1600/facebook.gif


 https://blogger.googleusercontent.com/img/b/R29vZ2xl/AVvXsEjcIdeVCpPnNxJD1gmSIfCBSJ7SKmtfuTIZ30F1Tg2FYCsv8h5IFst7FuPsB6NKYKvjrN1IL6xxK6E051Z8nMfO8Pkk93smqH-3Ju5nwK5JcEd6z9_y54WCHQ9hbJe-J5uiZ7nnCAPBGQc/s1600/anonymous3.png


https://blogger.googleusercontent.com/img/b/R29vZ2xl/AVvXsEjlY0sHPUupd2O-hKinwKpcHmbRT9LD3TGiBMuXAvu60EZqHytMm6BOmMkFnRRD1Bomb5tzKGySNogk5_PolJk9_gXcrirVzP_cExkBJVswQQ5hZ225t9LkckVrRKv9fTlwllvOfqKEwsMQ/s1600/blogger-user.png


http://icons.iconarchive.com/icons/pixelmixer/basic-2/64/user-anonymous-icon.png

How to add a beautiful image divider between every visitors comment?

0 comments
Comments are the most essential part for every blog because visitors give there opinion for blog or post through this comment. For that you should to take a step which visitors can know from where this comments is started & where its end. You should place a beautiful divider image for every comment. If you need so follow this post.

image divider

How to add image divider through every comment?


  • Just Log In your blog
  • Then go to Template & Backup your template
  • After Edit Html
  • Search For ]]></b:skin> & paste bellowing code just  above/before ]]></b:skin>

.comment-block {
background-image:url(https://blogger.googleusercontent.com/img/b/R29vZ2xl/AVvXsEgZzKO22sFbUfA_NZ6V7AIm7slwALTtLev7-qM1CT93E9ZyuGOU03bbCjIH7zH1ng7z-LwvCjz6gRxKjI1Ls6he0n_FlWKUdAh7ATeUF8HkMJg3Onchw1ImjrP-NKo_oZP8zggHq87JK2f9/s1600/74.gif);
background-repeat:no-repeat;
background-position:center bottom;
padding-bottom:30px;
margin-top: -10px;
}

.comments .continue {
border-top: 0px solid $(widget.alternate.text.color);
}

  •  Save your template & look your visitors comment

 Note: you can change this divider image

How To Add Multi-Column Footer Widget?

0 comments
Sometimes we need to keep more ads or widget in our blog. To add more widget or add we need a multi-footer or sider bar widget but multi-footer widget is very attractive more than sidebar. You can add many column which you want. This multi-column widget is stylish & an advanced version. If you need just follow this post.


How to add?

  • First Log In your blog
  • Then Go to Template & Backup your template
  • Then Edit Html Search (ctrl+F) for ]]></b:skin>
  • Paste the bellowing code just before/above ]]></b:skin>
/*----- MULTI COLUMN FOOTER WIDGET -----*/
#lower {
margin:auto;
padding: 0px 0px 10px 0px;
width: 100%;
background:#333333;
}
#lower-wrapper {
background:#333333;
margin:auto;
padding: 20px 0px 20px 0px;
width: 960px;
border:0;
}
#lowerbar-wrapper {
background:#333333;
float: left;
margin: 0px 5px auto;
padding-bottom: 20px;
width: 23%;
text-align: justify;
color:#ddd;
font: bold 12px Arial, Tahoma, Verdana;
line-height: 1.6em;
word-wrap: break-word;
overflow: hidden;
}
.lowerbar {margin: 0; padding: 0;}
.lowerbar .widget {margin: 0; padding: 10px 20px 0px 20px;}
.lowerbar h2 {
margin: 0px 0px 10px 0px;
padding: 3px 0px 3px 0px;
text-align: left;
border:0;
color:#ddd;
text-transform:uppercase;
font: bold 14px Arial, Tahoma, Verdana;
}
.lowerbar ul {
color:#fff;
margin: 0 auto;
padding: 0;
list-style-type: none;
}
.lowerbar li {
display:block;
color:#fff;
line-height: 1.6em;
margin-left: 0 !important;
padding: 6px;
border-bottom: 1px solid #222;
border-top: 1px solid #444;
list-style-type: none;
}
.lowerbar li a {
text-decoration:none; color: #DBDBDB;
}
.lowerbar li a:hover {
text-decoration:underline;
}
.lowerbar li:hover {
display:block;
background: #222;
}

Then Search for </body> & paste the bellowing code just above/before </body>


<div id='lower'>
<div id='lower-wrapper'>

<div id='lowerbar-wrapper'>
<b:section class='lowerbar' id='lowerbar1' preferred='yes'>
</b:section>
</div>

<div id='lowerbar-wrapper'>
<b:section class='lowerbar' id='lowerbar2' preferred='yes'>
</b:section>
</div>

<div id='lowerbar-wrapper'>
<b:section class='lowerbar' id='lowerbar3' preferred='yes'>
</b:section>
</div>

<div id='lowerbar-wrapper'>
<b:section class='lowerbar' id='lowerbar4' preferred='yes'>
</b:section>
</div>


<div style='clear: both;'/>
</div> </div>
 
Save your template & enjoy multi-footer widget
Note: You can change widget width & column number

How To Make A Bootable USB Flash/Pendrive?

0 comments
Wintobootic is a most popular bootable usb flash disk/hdd maker software. You can install any OS from usb flash disk/hdd by wintobootic software. It is a portable software & do not need to install. You can compare with another boot disk maker software & i am sure that you will say it is the best software. Just download & try to make a bootable usb flash disk.
How To Make A Bootable USB Flash/Pendrive

Features:

  • Can make a usb flash & hard disk bootable
  • Fast & Easy to use
  • Bug Fixed 
  • Windows 7/8 focused Boot Disk Maker
  • A freeware software
  • Create a bootable disk from an ISO

System Requirements:

  • Windows XP or later (32/64)
  • .NET Framework 2.0


How To Use AAA Logo?

0 comments
AAA LOGO is a most popular software for logo designing. Maximum website designer use Photoshop or AAA Logo to make a stylish logo for his/her blog/website. Maximum new blogger do not know how to use AAA logo for this reason they are not interested to use AAA logo software. You can make a logo easily & quickly through AAA logo. Follow this post  for "How to use AAA LOGO" ?

Aft fist Download AAA Logo software with serial from bellowing link


After downloading just install AAA Logo Software & use Serial key for registration of this software.
  • Then open AAA Logo software & chose a logo
  • Otherwise click ESC button of keyboard for a new blank project
  • Click Object for adding a NEW TEXT or IMAGE
  • Chose an image or write a word/sentence with different colorful & different font
  • Gradient option for making a slight image 


  • You can change Background color from Edit menu
Just try one time, i am sure you do not dislike AAA Logo software. Keep visiting...........

Editing Our Template (Remove & Add Copyright Code)

0 comments
Hi My Lovely Visitors, Now i m telling you about how to remove  Copyright Code of this template. If You want to See our Older post about Our Template Editing So just please click our Template Designing Label. It a series of our template editing. Step by step with practical theory, for that my visitors can use this template easily. Keep with us for learning "how to edit our Template easily" ?


To remove  © 2012 Designed by My Blogger Tricks option from this template you should search following code from html code

  • First Log in your blog --> then just click Templates --> then Edit Html
  • Search & delete the following code

var _0x2677=["\x6A\x51\x75\x65\x72\x79","\x62\x6C\x6F\x67\x67\x65\x72\x6E\x6F\x74\x69\x66\x69\x63\x61\x74\x69\x6F\x6E","\x66\x6E","\x74\x6F\x70","\x6C\x69\x6E\x65\x61\x72","\x65\x78\x74\x65\x6E\x64","\x65\x61\x73\x69\x6E\x67","\x73\x77\x69\x6E\x67","","\x74\x6F\x74\x61\x6C\x48\x65\x69\x67\x68\x74","\x68\x65\x69\x67\x68\x74","\x62\x6F\x72\x64\x65\x72\x53\x69\x7A\x65","\x64\x75\x72\x61\x74\x69\x6F\x6E","\x73\x68\x6F\x77\x41\x66\x74\x65\x72","\x23\x62\x6C\x6F\x67\x67\x65\x72\x6E\x6F\x74\x69\x66\x69\x63\x61\x74\x69\x6F\x6E","\x66\x69\x6E\x64","\x2E\x6C\x69\x6E\x6B","\x23\x63\x6C\x6F\x73\x65\x62\x6C\x6F\x67\x67\x65\x72\x6E\x6F\x74\x69\x66\x69\x63\x61\x74\x69\x6F\x6E","\x23\x6F\x70\x65\x6E\x62\x6C\x6F\x67\x67\x65\x72\x6E\x6F\x74\x69\x66\x69\x63\x61\x74\x69\x6F\x6E","\x61\x6E\x69\x6D\x61\x74\x65","\x6F\x70\x65\x6E\x62\x6C\x6F\x67\x67\x65\x72\x6E\x6F\x74\x69\x66\x69\x63\x61\x74\x69\x6F\x6E","\x72\x65\x6D\x6F\x76\x65\x43\x6C\x61\x73\x73","\x61\x62\x73","\x61\x64\x64\x43\x6C\x61\x73\x73","\x6D\x61\x72\x67\x69\x6E\x54\x6F\x70","\x74\x6F\x70\x5F\x66\x69\x78\x65\x64","\x62\x6F\x74\x74\x6F\x6D","\x62\x6F\x74\x74\x6F\x6D\x5F\x66\x69\x78\x65\x64","\x70\x6F\x73\x69\x74\x69\x6F\x6E","\x64\x65\x74\x61\x63\x68","\x62\x6C\x6F\x63\x6B","\x63\x73\x73","\x62\x6F\x64\x79","\x70\x72\x65\x70\x65\x6E\x64\x54\x6F","\x6C\x65\x6E\x67\x74\x68","\x2E\x6D\x75\x6C\x74\x69\x4D\x65\x73\x73\x61\x67\x65\x73","\x69\x6E\x69\x74","\x6D\x75\x6C\x74\x69\x70\x6C\x65\x4D\x65\x73\x73\x61\x67\x65\x73","\x6B\x65\x65\x70\x48\x69\x64\x64\x65\x6E","\x63\x6C\x6F\x73\x65\x61\x62\x6C\x65","\x63\x6C\x69\x63\x6B","\x70\x6F\x73\x74","\x63\x6C\x69\x63\x6B\x3D\x74\x72\x75\x65","\x61\x6A\x61\x78","\x3C\x61\x20\x73\x74\x79\x6C\x65\x3D\x22\x6D\x61\x72\x67\x69\x6E\x2D\x74\x6F\x70\x3A\x35\x70\x78\x3B\x20\x6D\x61\x72\x67\x69\x6E\x2D\x6C\x65\x66\x74\x3A\x37\x70\x78\x3B\x20\x63\x6F\x6C\x6F\x72\x3A\x23\x36\x36\x36\x36\x36\x36\x3B\x20\x66\x6C\x6F\x61\x74\x3A\x6C\x65\x66\x74\x3B\x22\x20\x74\x61\x72\x67\x65\x74\x3D\x22\x5F\x62\x6C\x61\x6E\x6B\x22\x20\x68\x72\x65\x66\x3D\x22\x68\x74\x74\x70\x3A\x2F\x2F\x77\x77\x77\x2E\x4D\x79\x42\x6C\x6F\x67\x67\x65\x72\x54\x72\x69\x63\x6B\x73\x2E\x63\x6F\x6D\x22\x3E\x3C\x69\x6D\x67\x20\x73\x72\x63\x3D\x22\x68\x74\x74\x70\x3A\x2F\x2F\x34\x2E\x62\x70\x2E\x62\x6C\x6F\x67\x73\x70\x6F\x74\x2E\x63\x6F\x6D\x2F\x2D\x36\x44\x37\x6D\x2D\x69\x74\x57\x64\x6E\x6F\x2F\x55\x4E\x32\x77\x30\x54\x54\x33\x5A\x6C\x49\x2F\x41\x41\x41\x41\x41\x41\x41\x41\x49\x59\x63\x2F\x43\x4A\x78\x64\x73\x4C\x72\x57\x6B\x51\x67\x2F\x73\x34\x30\x30\x2F\x6D\x62\x74\x2E\x70\x6E\x67\x22\x2F\x3E\x3C\x2F\x61\x3E","\x70\x72\x65\x70\x65\x6E\x64","\x3C\x64\x69\x76\x20\x73\x74\x79\x6C\x65\x3D\x22\x62\x61\x63\x6B\x67\x72\x6F\x75\x6E\x64\x3A\x20\x23\x31\x31\x31\x31\x31\x31\x3B\x62\x6F\x72\x64\x65\x72\x2D\x74\x6F\x70\x3A\x20\x31\x70\x78\x20\x73\x6F\x6C\x69\x64\x20\x23\x32\x32\x32\x32\x32\x32\x3B\x68\x65\x69\x67\x68\x74\x3A\x20\x32\x35\x70\x78\x3B\x22\x3E\x3C\x64\x69\x76\x20\x73\x74\x79\x6C\x65\x3D\x22\x77\x69\x64\x74\x68\x3A\x39\x36\x30\x70\x78\x3B\x20\x6D\x61\x72\x67\x69\x6E\x3A\x30\x70\x78\x20\x61\x75\x74\x6F\x3B\x20\x6D\x61\x72\x67\x69\x6E\x2D\x74\x6F\x70\x3A\x2D\x37\x70\x78\x3B\x20\x22\x3E\x3C\x61\x20\x73\x74\x79\x6C\x65\x3D\x22\x70\x61\x64\x64\x69\x6E\x67\x3A\x31\x33\x70\x78\x20\x35\x70\x78\x20\x30\x70\x78\x20\x35\x70\x78\x3B\x20\x63\x6F\x6C\x6F\x72\x3A\x23\x41\x37\x41\x37\x41\x37\x3B\x20\x66\x6F\x6E\x74\x2D\x66\x61\x6D\x69\x6C\x79\x3A\x61\x72\x69\x61\x6C\x3B\x20\x66\x6F\x6E\x74\x2D\x73\x69\x7A\x65\x3A\x31\x30\x70\x78\x3B\x20\x74\x65\x78\x74\x2D\x64\x65\x63\x6F\x72\x61\x74\x69\x6F\x6E\x3A\x6E\x6F\x6E\x65\x3B\x20\x66\x6C\x6F\x61\x74\x3A\x6C\x65\x66\x74\x3B\x22\x20\x20\x74\x61\x72\x67\x65\x74\x3D\x22\x5F\x62\x6C\x61\x6E\x6B\x22\x20\x68\x72\x65\x66\x3D\x22\x68\x74\x74\x70\x3A\x2F\x2F\x77\x77\x77\x2E\x4D\x79\x42\x6C\x6F\x67\x67\x65\x72\x54\x72\x69\x63\x6B\x73\x2E\x63\x6F\x6D\x22\x3E\xA9\x20\x32\x30\x31\x32\x20\x44\x65\x73\x69\x67\x6E\x65\x64\x20\x62\x79\x20\x4D\x79\x20\x42\x6C\x6F\x67\x67\x65\x72\x20\x54\x72\x69\x63\x6B\x73\x3C\x2F\x61\x3E\x3C\x2F\x64\x69\x76\x3E\x3C\x2F\x64\x69\x76\x3E","\x61\x70\x70\x65\x6E\x64","\x68\x74\x6D\x6C","\x65\x61\x73\x65\x4F\x75\x74\x42\x6F\x75\x6E\x63\x65","\x68\x61\x73\x4F\x77\x6E\x50\x72\x6F\x70\x65\x72\x74\x79","\x23\x62\x6C\x6F\x67\x67\x65\x72\x6E\x6F\x74\x69\x66\x69\x63\x61\x74\x69\x6F\x6E\x57\x72\x61\x70","\x72\x65\x61\x64\x79","\x73\x68\x6F\x77","\x73\x75\x70\x65\x72\x66\x69\x73\x68","\x23\x73\x75\x62\x6D\x65\x6E\x75\x20\x75\x6C\x2E\x73\x66\x6D\x65\x6E\x75"];;;(function (_0xa6b9x1){_0xa6b9x1[_0x2677[2]][_0x2677[1]]=function (_0xa6b9x2){var _0xa6b9x3={duration:500,position:_0x2677[3],closeable:true,showAfter:0,keepHidden:false,borderSize:3,height:40,easing:_0x2677[4]},_0xa6b9x4=_0xa6b9x1[_0x2677[5]]({},_0xa6b9x3,_0xa6b9x2);if(_0xa6b9x4[_0x2677[6]]==_0x2677[7]){_0xa6b9x4[_0x2677[6]]=_0x2677[8];} ;_0xa6b9x4[_0x2677[9]]=parseInt(_0xa6b9x4[_0x2677[10]],10)+parseInt(_0xa6b9x4[_0x2677[11]],10);_0xa6b9x4[_0x2677[12]]=parseInt(_0xa6b9x4[_0x2677[12]],10);_0xa6b9x4[_0x2677[13]]=parseInt(_0xa6b9x4[_0x2677[13]],10)*1000;var _0xa6b9x5=_0xa6b9x1(this),_0xa6b9x6=_0xa6b9x5[_0x2677[15]](_0x2677[14]),_0xa6b9x7=_0xa6b9x6[_0x2677[15]](_0x2677[16]),_0xa6b9x8=_0xa6b9x6[_0x2677[15]](_0x2677[17]),_0xa6b9x9=_0xa6b9x5[_0x2677[15]](_0x2677[18]),_0xa6b9xa={},_0xa6b9xb=_0x2677[8],_0xa6b9xc={},_0xa6b9xd=_0x2677[8],_0xa6b9xe=function (){_0xa6b9xc[_0xa6b9xd]=_0xa6b9x4[_0x2677[9]];_0xa6b9x9[_0x2677[19]](_0xa6b9xc,(_0xa6b9x4[_0x2677[12]]/2),_0xa6b9x4[_0x2677[6]]);_0xa6b9x5[_0x2677[21]](_0x2677[20]);} ,_0xa6b9xf=function (){_0xa6b9xc[_0xa6b9xd]=-Math[_0x2677[22]](34-_0xa6b9x4[_0x2677[10]]);_0xa6b9x9[_0x2677[19]](_0xa6b9xc,(_0xa6b9x4[_0x2677[12]]/2),function (){_0xa6b9x10();} );} ,_0xa6b9x10=function (){_0xa6b9xa[_0xa6b9xb]=0;_0xa6b9x5[_0x2677[19]](_0xa6b9xa,_0xa6b9x4[_0x2677[12]],_0xa6b9x4[_0x2677[6]],function (){_0xa6b9x5[_0x2677[23]](_0x2677[20]);} );} ,_0xa6b9x11=function (){_0xa6b9xa[_0xa6b9xb]=-_0xa6b9x4[_0x2677[9]];_0xa6b9x5[_0x2677[19]](_0xa6b9xa,_0xa6b9x4[_0x2677[12]],function (){_0xa6b9xe();} );} ,_0xa6b9x12=false;switch(_0xa6b9x4[_0x2677[28]]){case _0x2677[3]:_0xa6b9xb=_0x2677[24];_0xa6b9xd=_0x2677[3];break ;;case _0x2677[25]:_0xa6b9xb=_0x2677[3];_0xa6b9xd=_0x2677[3];break ;;case _0x2677[27]:_0xa6b9xb=_0x2677[26];_0xa6b9xd=_0x2677[26];break ;;} ;_0xa6b9x5[_0x2677[29]]();_0xa6b9x5[_0x2677[33]](_0x2677[32])[_0x2677[31]]({display:_0x2677[30]});if(_0xa6b9x6[_0x2677[15]](_0x2677[35])[_0x2677[34]]){bloggernotificationExtras[_0x2677[37]][_0x2677[36]]();} ;if(_0xa6b9x12&&_0xa6b9x4[_0x2677[38]]&&_0xa6b9x4[_0x2677[39]]){setTimeout(function (){_0xa6b9xe();} ,_0xa6b9x4[_0x2677[13]]);} else {setTimeout(function (){_0xa6b9x10();} ,_0xa6b9x4[_0x2677[13]]);} ;_0xa6b9x8[_0x2677[40]](function (){_0xa6b9x11();setCookie();} );_0xa6b9x9[_0x2677[40]](function (){_0xa6b9xf();setCookie();} );_0xa6b9x7[_0x2677[40]](function (){_0xa6b9x1[_0x2677[43]]({type:_0x2677[41],data:_0x2677[42],success:function (_0xa6b9x13){} });return true;} );} ;} )(window[_0x2677[0]]);jQuery(document)[_0x2677[52]](function (_0xa6b9x1){_0xa6b9x1(_0x2677[14])[_0x2677[45]](_0x2677[44]);_0xa6b9x1(_0x2677[48])[_0x2677[47]](_0x2677[46]);if(!_0xa6b9x1[_0x2677[6]][_0x2677[50]](_0x2677[49])){_0xa6b9x1[_0x2677[5]](_0xa6b9x1[_0x2677[6]],{easeOutBounce:function (_0xa6b9x14,_0xa6b9x15,_0xa6b9x16,_0xa6b9x17,_0xa6b9x18){if((_0xa6b9x15/=_0xa6b9x18)<(1/2.75)){return _0xa6b9x17*(7.5625*_0xa6b9x15*_0xa6b9x15)+_0xa6b9x16;} else {if(_0xa6b9x15<(2/2.75)){return _0xa6b9x17*(7.5625*(_0xa6b9x15-=(1.5/2.75))*_0xa6b9x15+0.75)+_0xa6b9x16;} else {if(_0xa6b9x15<(2.5/2.75)){return _0xa6b9x17*(7.5625*(_0xa6b9x15-=(2.25/2.75))*_0xa6b9x15+0.9375)+_0xa6b9x16;} else {return _0xa6b9x17*(7.5625*(_0xa6b9x15-=(2.625/2.75))*_0xa6b9x15+0.984375)+_0xa6b9x16;} ;} ;} ;} });} ;_0xa6b9x1(_0x2677[51])[_0x2677[1]]({position:_0x2677[3],showAfter:0,keepHidden:true,duration:300,closeable:true,height:40,borderSize:1,easing:_0x2677[7]});} );jQuery(document)[_0x2677[52]](function (){jQuery(_0x2677[55])[_0x2677[54]]({delay:500,animation:{opacity:_0x2677[53],height:_0x2677[53]},dropShadows:true});} );


How To Add Copyright Code in this Template?

To add a copyright code to this template you should to find  </body> From Edit Html option of blogger

then paste the following code above/before </body>

<div dir='ltr' style='text-align: left;' trbidi='on'>
<div style='text-align: center;'>
<span style='color: blue;'>Copyright &#169; 2013 <a href='http://tech-everyday.blogspot.com/'>Tech-Everyday</a></span></div>
</div>

Your template will be ready for copyright trademark of your blog/website. Enjoy blogging..........

Editing Our Template (Part 2)

0 comments
For editing this template you should to change this template design by your choice. We learn something about this template editing. To learn a better  design of this template you should follow all the post Of Template Designing. Get ready for editing this template as a new look.

  • First please Log In to blogger
  • Then go to Templates & Backup your template
  • After click Edit HTML


After search (Ctrl+F) the bellowing link

https://blogger.googleusercontent.com/img/b/R29vZ2xl/AVvXsEinSaNmk15ISb9U_2z-_M-jthCAIky0NUWhMbMUcQ0UJ3SiCacXWi9mK3eKFDblVgZVJdHlj9ADl-HuOpTD8iVLcEVyYjyHPtXrT4ys9phzxIAwbjkoSvJNl4mbv5PwIL4aPe2Dm_VASw8C/s1600/Hostgator-goDaddy.png


Download this & edit this image by Photoshop or AAA Logo
Then upload your edited image & replace your link

https://blogger.googleusercontent.com/img/b/R29vZ2xl/AVvXsEinSaNmk15ISb9U_2z-_M-jthCAIky0NUWhMbMUcQ0UJ3SiCacXWi9mK3eKFDblVgZVJdHlj9ADl-HuOpTD8iVLcEVyYjyHPtXrT4ys9phzxIAwbjkoSvJNl4mbv5PwIL4aPe2Dm_VASw8C/s1600/Hostgator-goDaddy.png

To

 http:// your uploaded image link


Then Search (Ctrl+F) bellowing sentence
  • What is Web Hosting?
  • Why HostGator?
  • 25pcentCoupon

& Replace the following code 

<li><a href=' Your Post Link'><font color='#75C303'>Your Post Title</font></a></li>

Enjoy this template  as your  choice

Recent Comments

ALEXA RANK

Copyright © 2013-2014 Tech-Everyday